
Manual Alignment and Stacking in Photoshop
My process for manual stacking starts in the same way as it does for automated stacking. Open up the images you want to stack in camera raw (or lightroom) and make your basic adjustments to the image (for me, usually temperature adjustment, bumping up the whites and highlights a touch and added a small amount of dehaze. I leave the lens distortion as is)
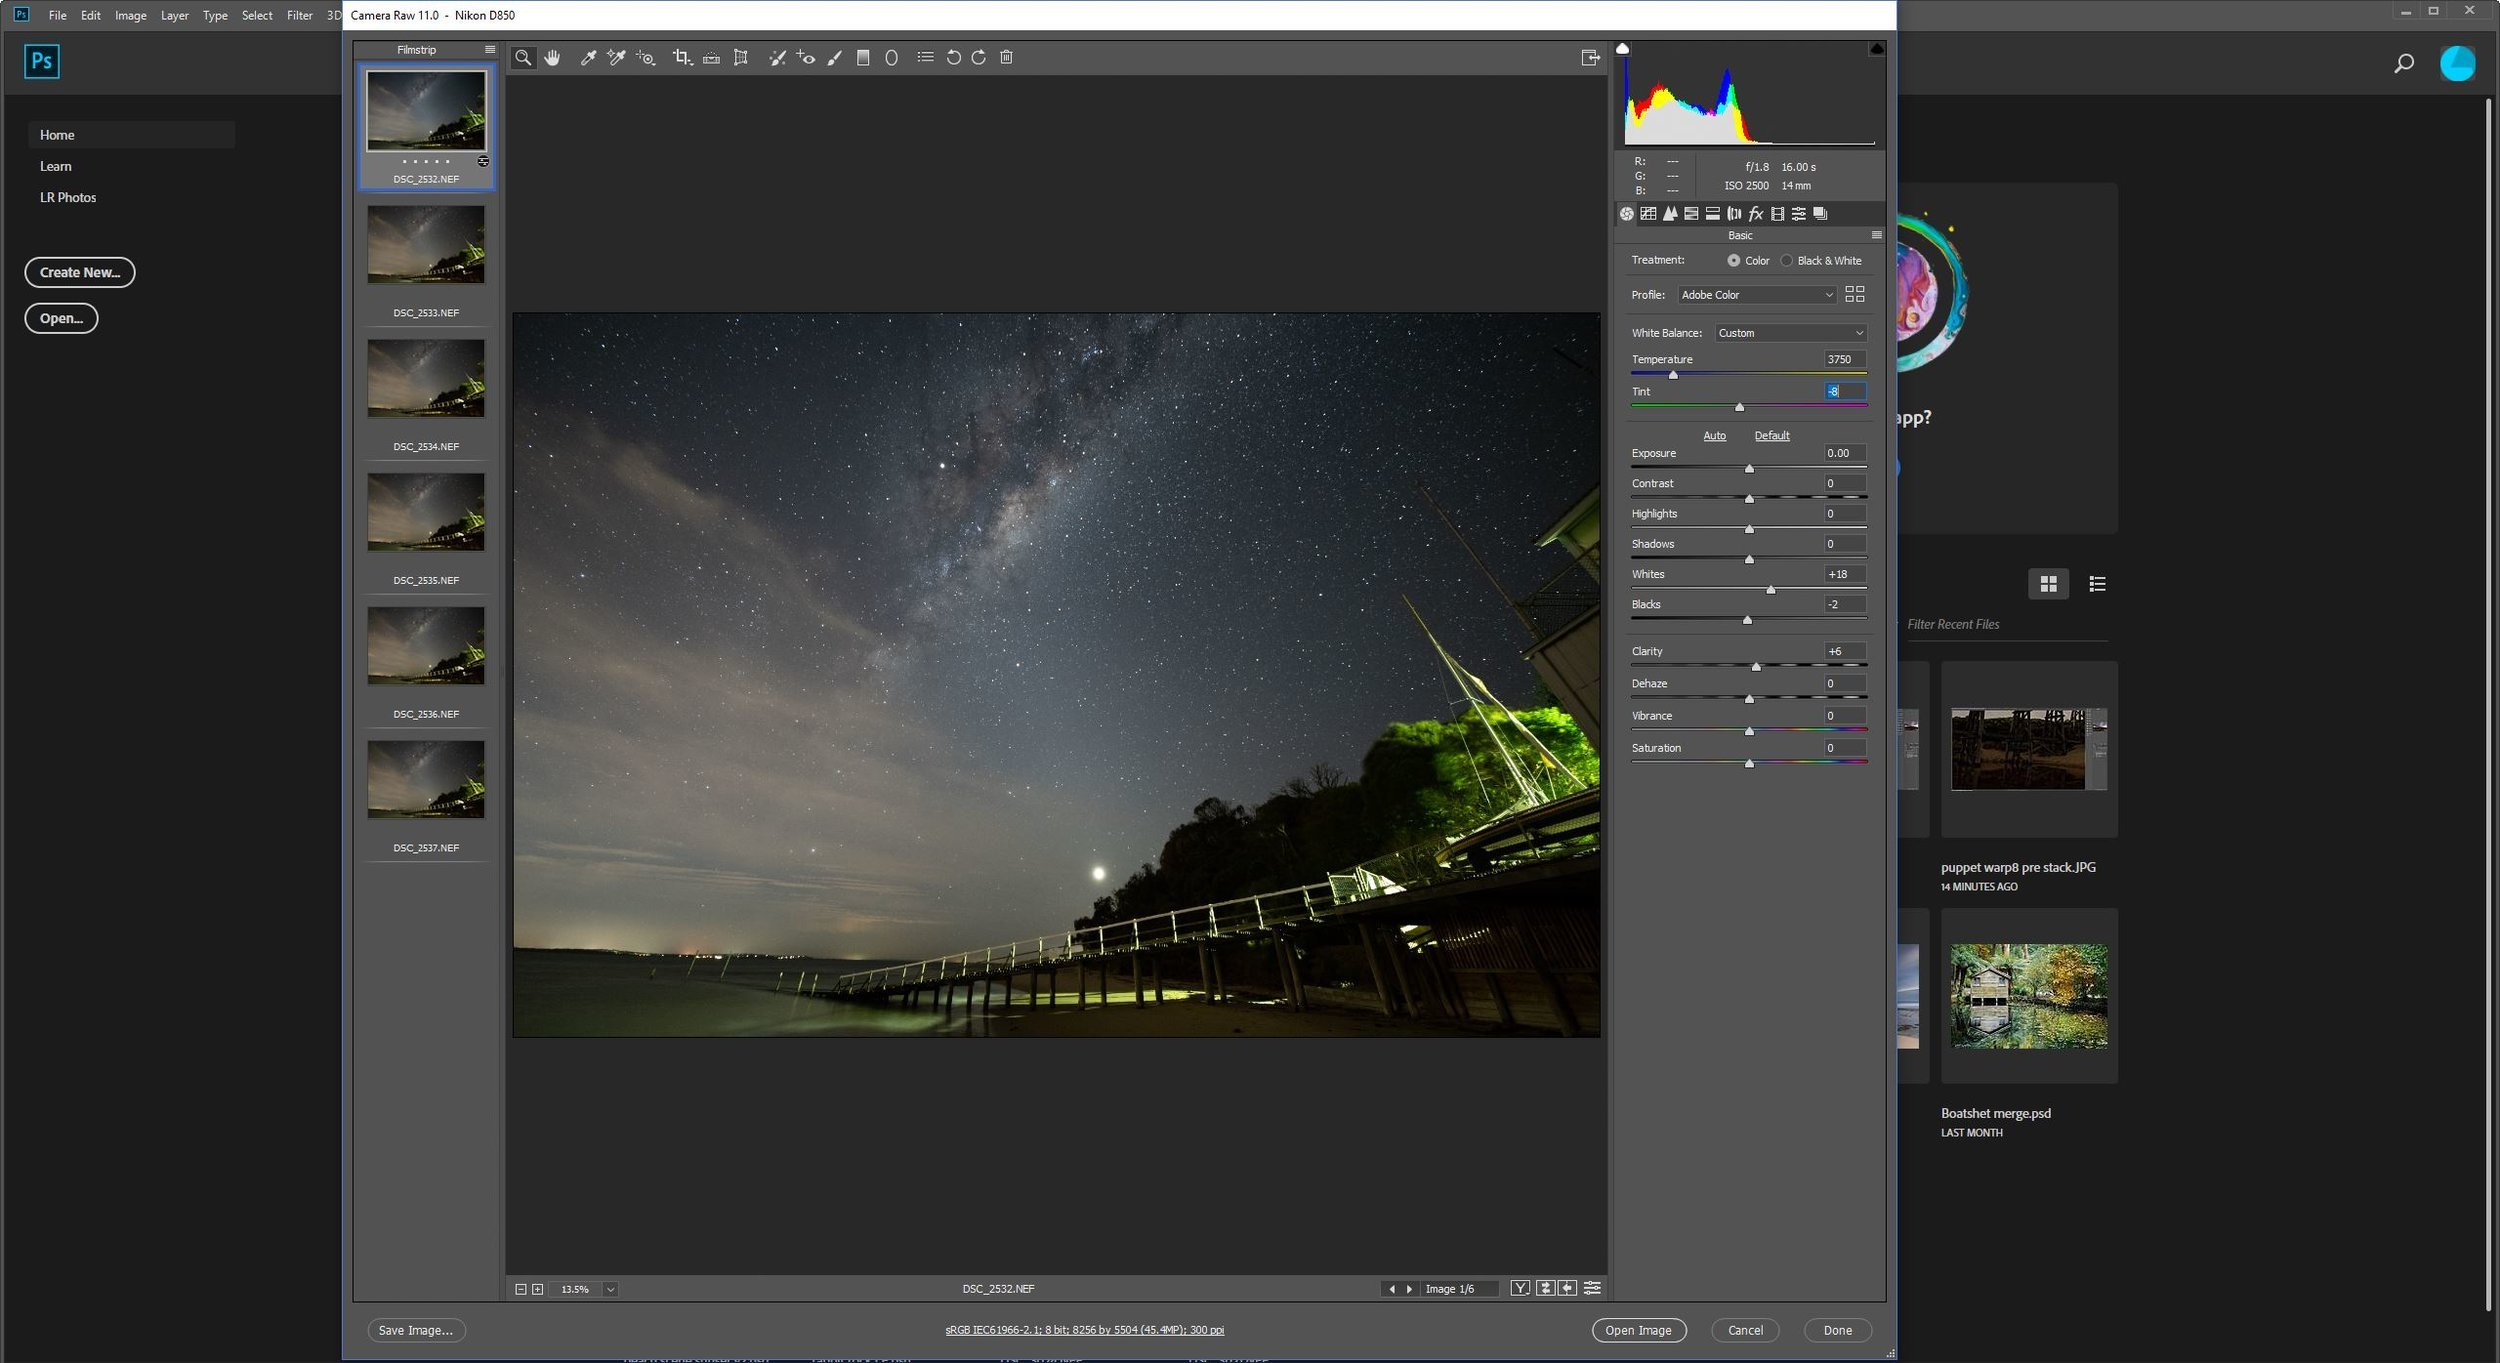
Opening up the images I want to stack and making basic adjustments
Once you have made your adjustments, click on sync settings and sync all of your images to have the same adjustments.

Sync your adjustments across all your images
One benefit of doing these adjustments in camera raw is that you can now go ahead and click on “Open Images” to open all of the images in photoshop.
The next step is to get all of your images across into one with each being a layer. Luckily, photoshop makes this process easy. Click on “File” and then “Scripts” and “Load Files into Stack”. When choosing the files, click on “Add Open Files”. If you are stacking a simple sky image, you can click on “Attempt to Automatically Align Source Images”, however if you have a foreground that requires stacking, you should leave this off, as you’ll need to do the two elements separately.

Photoshop making life easy! Open all your images as layers in the one document
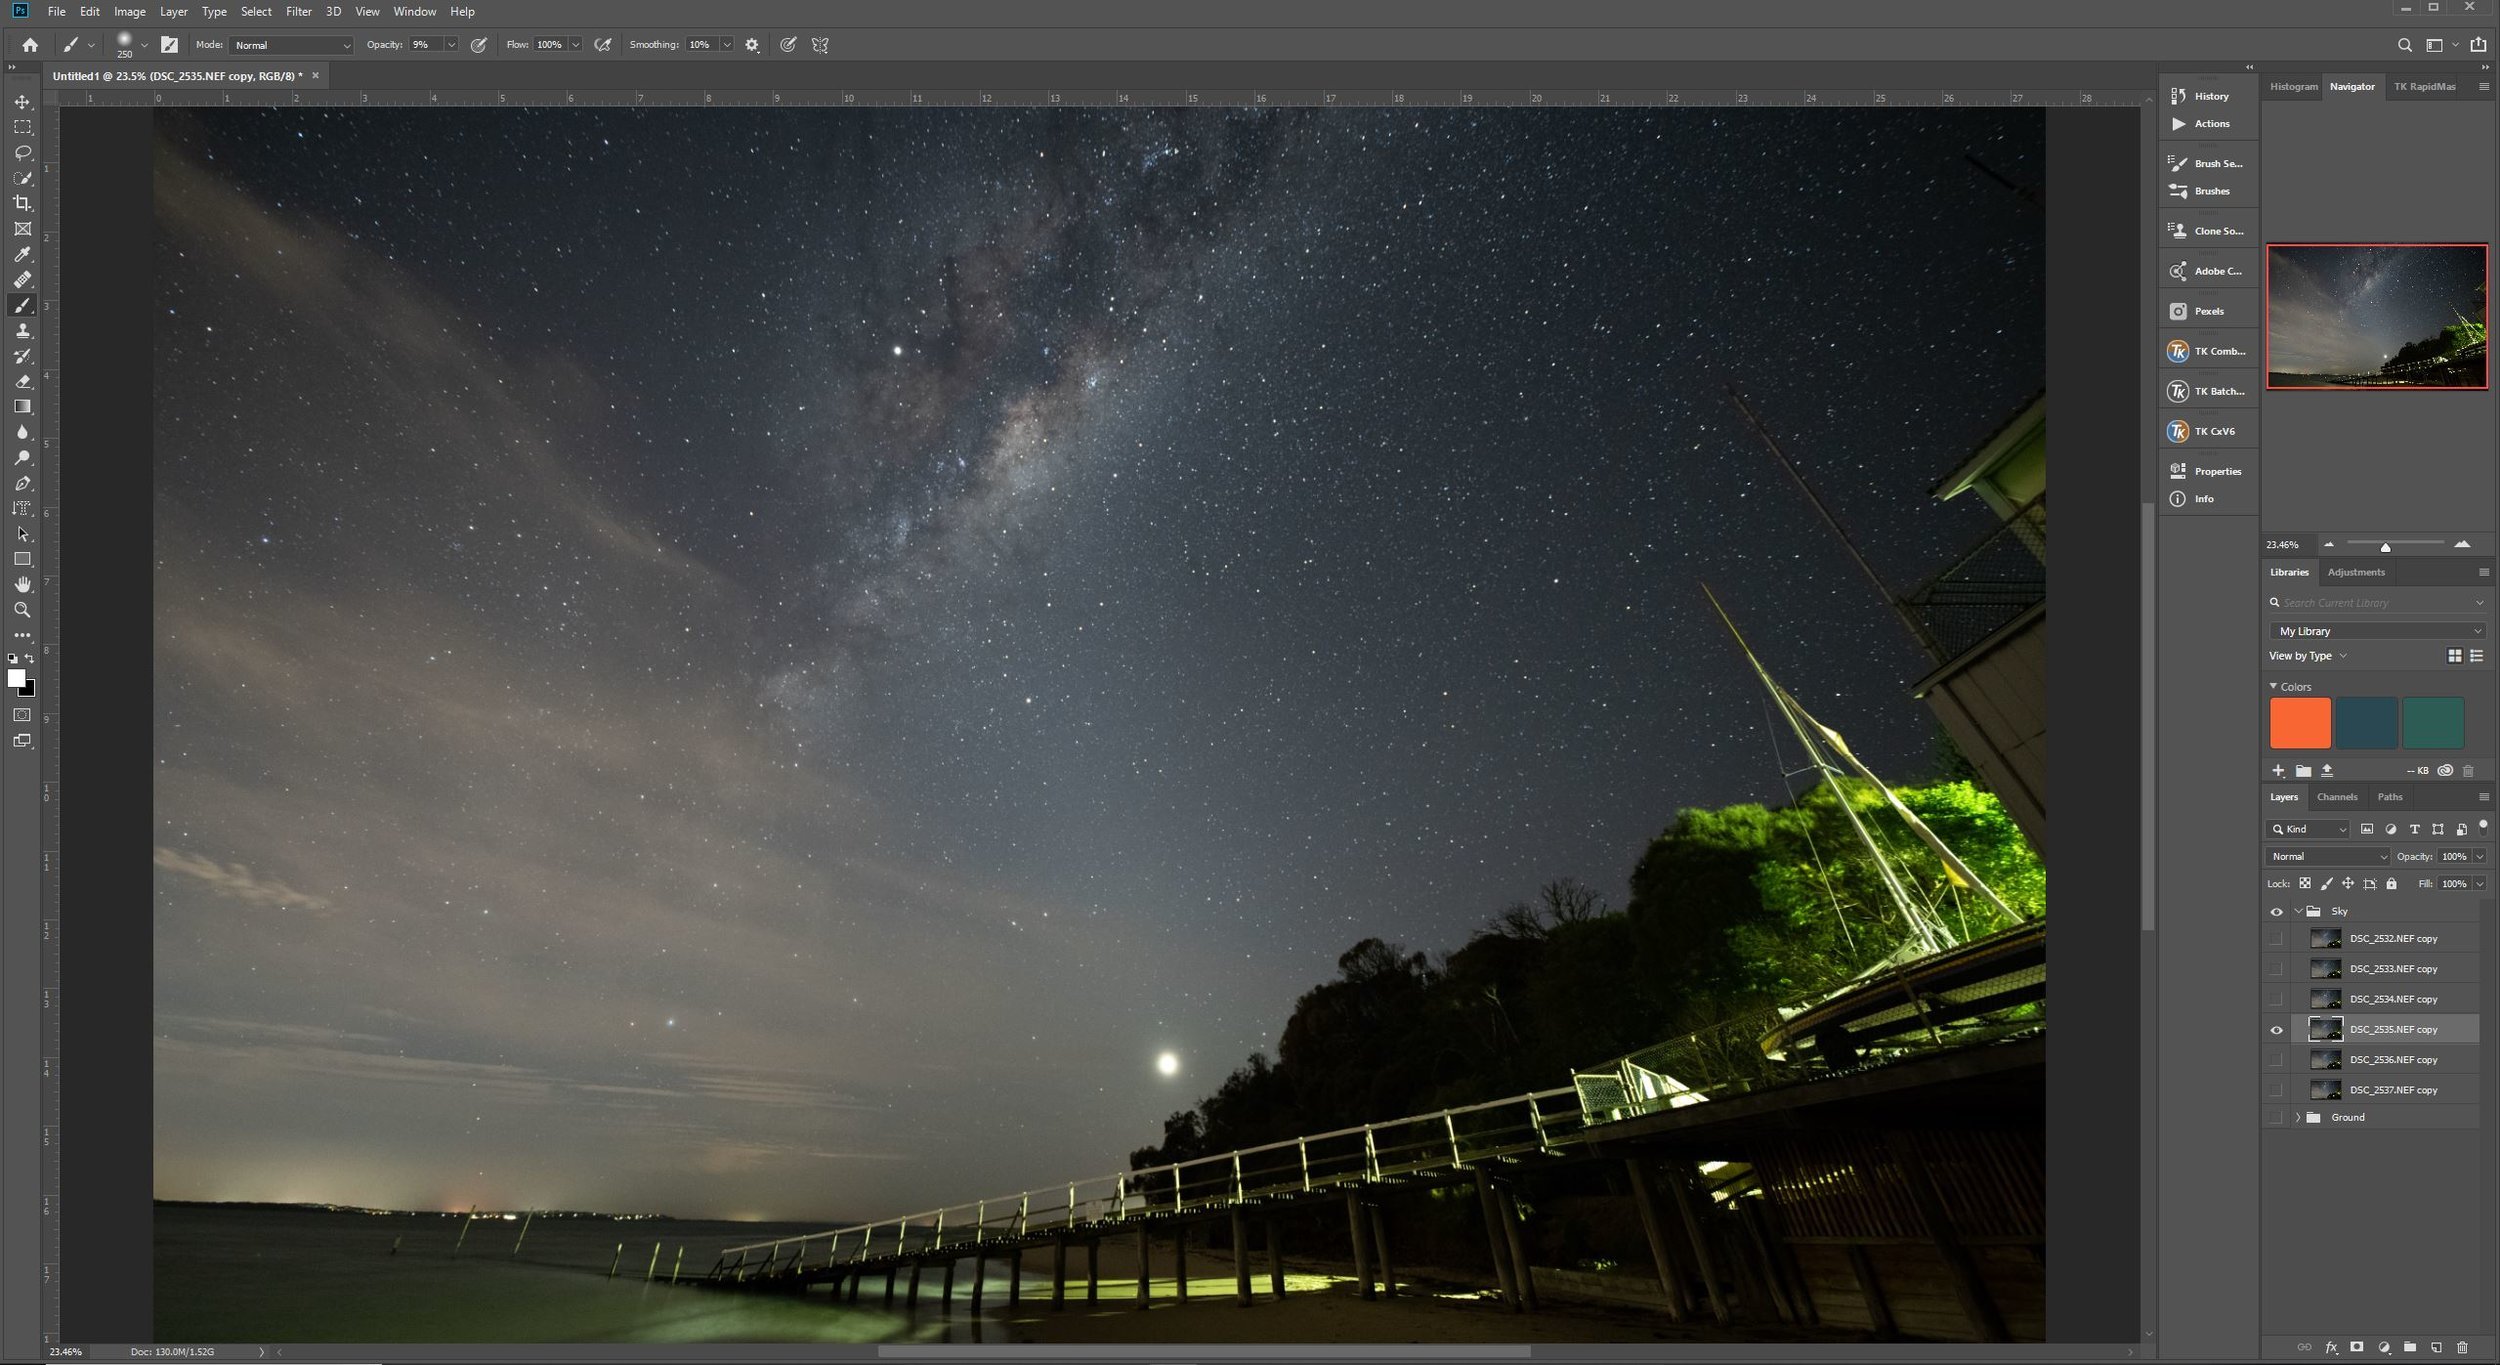
You should now have a new file open with all of the images loaded as layers.
The following steps are going to assume you have a foreground that also requires stacking.
Highlight all of your layers and click on Ctrl (or Cmd) J to duplicate the layers, and then hit Ctrl (or Cmd) G to group them. Highlight your original layers and click on Ctrl (Cmd) G to group those as well. We can call one group “Sky” and one “Ground”.
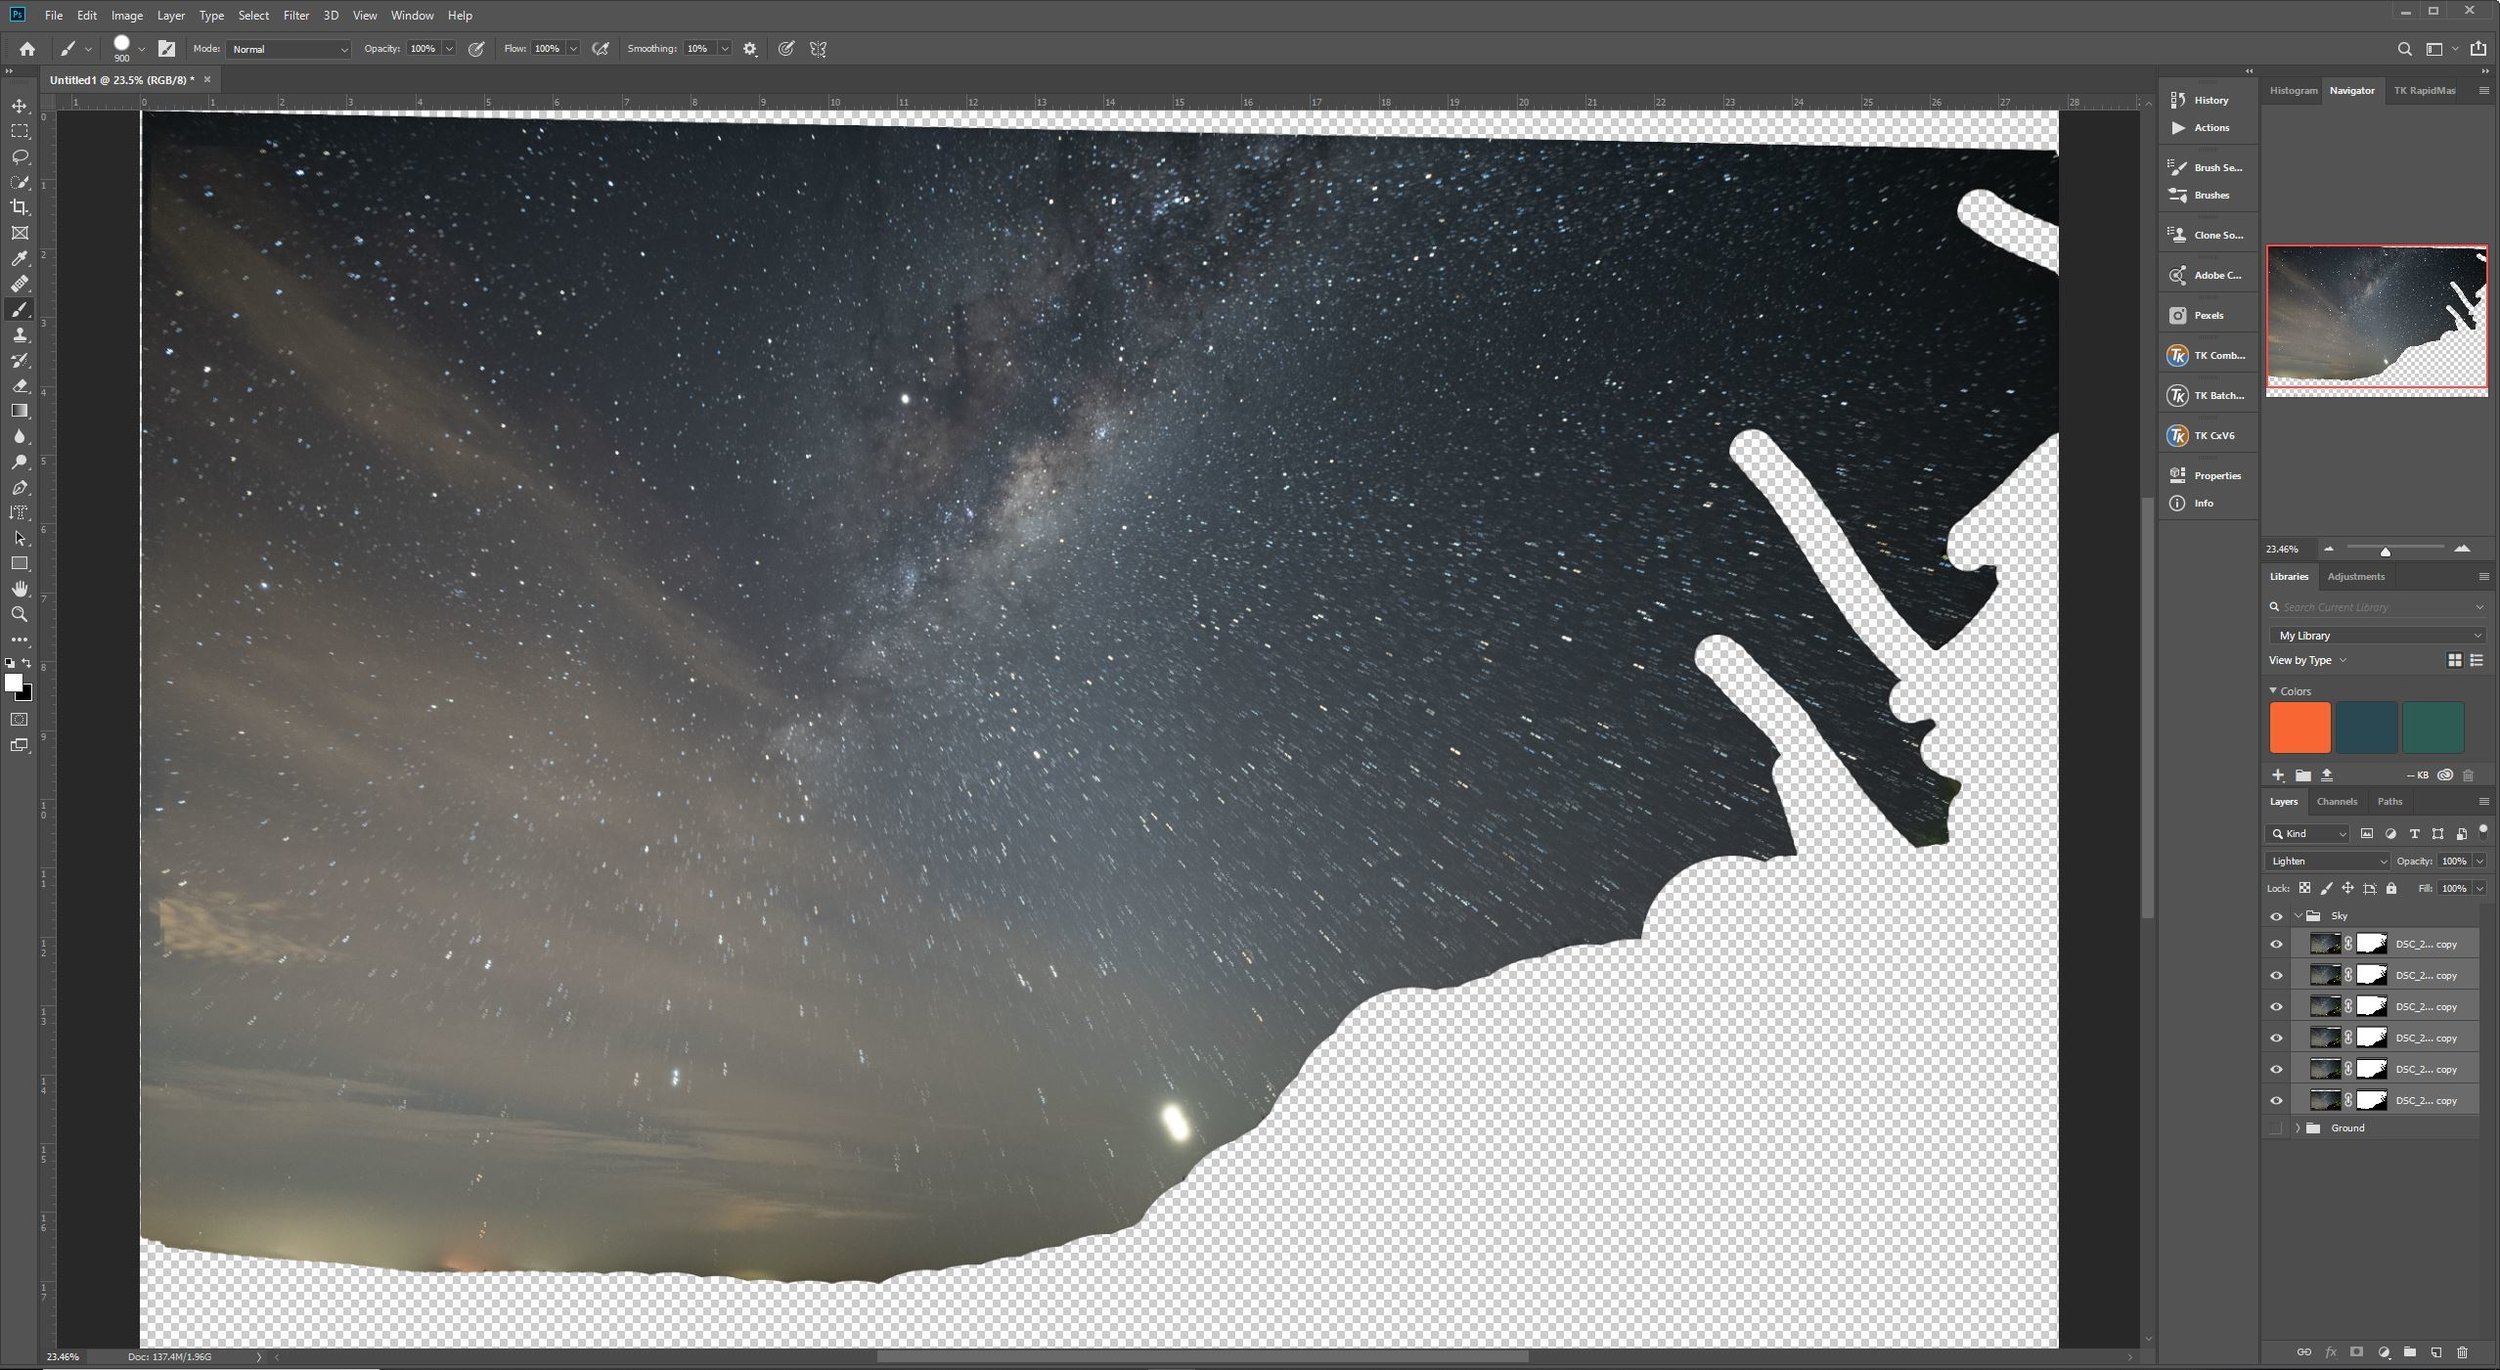
I usually start working on the sky first. Turn off the ground group and open the sky group up. Find the layer that is roughly in the middle of your stack, we’ll start by working from this layer. Hold “Alt” whilst you click on the eye symbol to only show that layer. Create a layer mask and set your brush to black with a hard round brush with 100% opacity and flow. Now brush over the foreground to remove it. It doesn’t have to be super accurate, but do try to remove all foreground elements if possible and leave as many stars out of your mask if you can.
We’re now going to transfer that layer mask over to all of the other layers. Hold Ctrl (or Cmd) and click on the layer mask. You’ll see the marching ants show up that depict a selection has been made. Click on one of the layers above or below and click on the create layer mask button. You can now repeat this process with all of the layers in the sky group.

Selecting our layer mask and creating a new layer mask for each sky layer
Once that is done, it’s time to align the sky. Highlight all of the layers in the sky group (with the layer masks on) then click on “Edit” and “Auto-Align Layers”. You’ll see a pop up with a bunch of settings – leave it on auto align, remove any distortion or vignette control and hit start.
To check whether it has done a good job or not, highlight all of your layers and change the blend mode to “lighten”. We can see in my example that it has done a terrible job of aligning, with most of the stars now showing large amounts of trailing and blurring. Unfortunately, sometimes this does happen (and may happen when using a program like Sequator), so we’re going to have to manually align each layer.
Auto Align has done a terrible job of alignment. Everything is blurred with trailing of all the stars. Time to manually align the layers!
Hit Ctrl + Z to undo the auto align.
We’re going to work from the middle again. Aligning each layer to the middle layer means that you need to do less in terms of manipulation of the image elements. Click on Alt and then the middle layer eyeball icon to display only the middle layer, and then click on the eyeball icon of the layer above to display the next layer up. Now change the blend mode of the layer that is on top to “Difference”.
You’ll now see a relatively black image. Let me explain how this blend mode works – anything that is the same between the two layers is displayed in black. Anything that is different will be shown. So the goal with our alignment process, in an ideal world, is to have a completely black image.

Working on stacking the base layer to the layer above it. Notice how difference mode creates a dark image - all the black areas are the same, all the areas that aren’t black are different (and hence not aligned)
I normally start with some gross manipulation. Hit Ctrl (Cmd) + T to enter free transform mode.
Break up your image into sections in your mind. We’re going to start by making the centre as black as possible, then focus on the corners. Start by using your arrow keys to nudge the image in each direction until you find a spot where the middle is as black as possible. Next right click and click on “rotate”. Go to each corner. Rotate the image left or right, again aiming to get as much black as possible in your image. Finally, right click and click on “Warp”. You’ll see your image now has been segmented into 9 squares. This is the warp tool that allows you to warp individual parts of the image by pulling/compressing on each edge or adjusting the blue bar in each corner. If you get perfect results with it, that’s fantastic and you can now move on to the next layers, however usually I find it’s not as accurate as my next trick so click on the tick to save your transform changes and let’s move on to that.
This next trick took me a lot of trial and error to discover, as I haven’t seen it on other stacking tutorials before. We’re going to use “Puppet Warp”! With your layer selected, click on “Edit” and “Puppet Warp”.

Time to Puppet Warp!
Puppet warp will bring up a mesh on top of your layer – each represents an area of the image that can be distorted, just like in the “Warp” tool mentioned above. The difference being the vast number of segments that can be individually manipulated leads to a much more accurate alignment. To turn off the mesh, untick the “show mesh” button on your top toolbar (I usually turn it off to make sure I get the most accurate alignment).
Now, click on all of the areas that are well aligned to drop a pin on them – these points will stay static when you move other areas so that you don’t undo any hard work you’ve already completed.

All these areas have good alignment, so I’ll drop a pin on them to make sure they don’t move when I manipulate other areas of the image
Once you have done this, click on each area where the stars are not aligned to drop a pin, and simply use the arrow keys to nudge the stars into alignment (ie/ turn the picture as black as possible in difference blend mode as all the areas line up). Once you have done that, click on the tick in the top toolbar to save your changes.

Each new pin represents an area of the image I have nudged to get better alignment. More of my image is black now, which means less difference between the layers
You now need to repeat the process with each layer, however make sure you stack it to the middle layer you first selected. To do this, turn the layer that has just been stacked off (click on the eyeball icon next to the layer) after changing the blend mode back to “normal” and turn on the layer above it, repeating the same process as above. When you work on the layers underneath the middle layer (ie/ our ‘base’ image), simply move that layer above the base layer and repeat the process.
The reason I use a middle layer is that it means you require less nudging/manipulation of shots rather than just using the last layer. This is because each shot represents at least 10+s of exposure (depending on your camera settings), and with many captures you will see a lot of movement in the stars over the space of 2+ minutes. Aligning to an image in the middle of this process means that your movement between the two images will be much less.
Once you have finished all of the alignment we can begin the process of combining the layers into a stack. Delete all of the layer masks you have previously created (highlight the mask, delete, don’t merge before deleting).
Highlight all the layers and then click on “Layer”, “Smart Objects” and “Convert for Smart Object”. This will convert all the layers into a stack that is now a smart object.
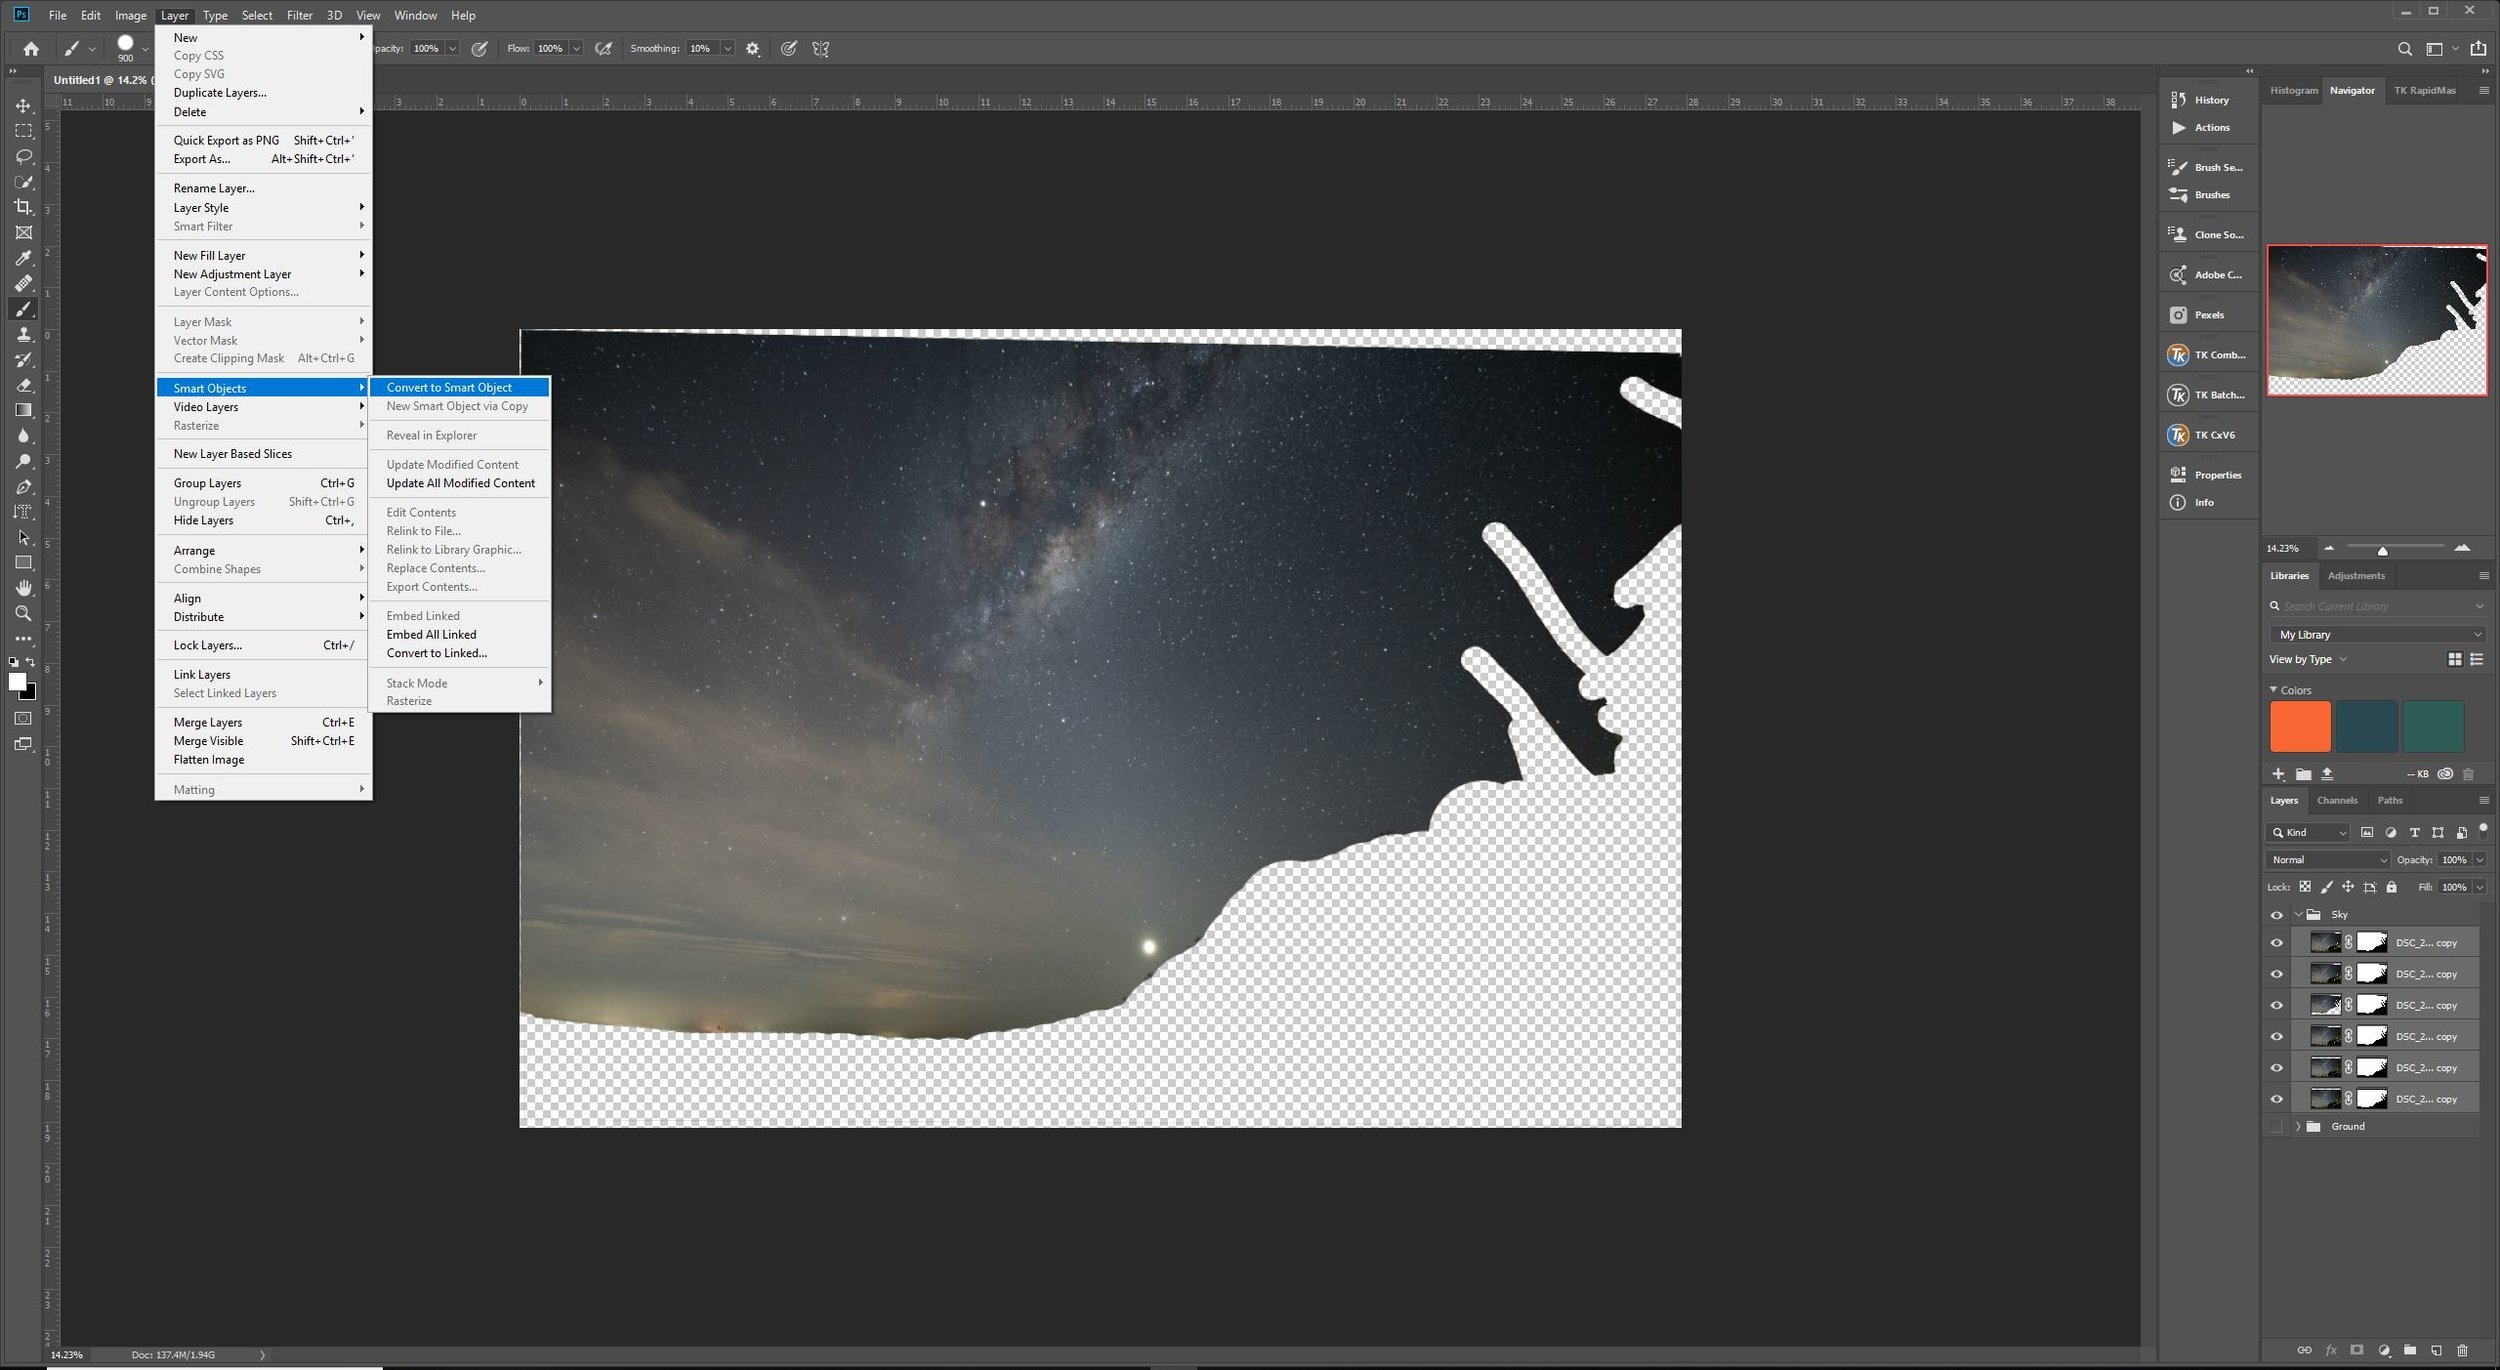
Convert all the stacked layers to a smart object
The final step in stacking the sky is to once again click on “Layer” with the new layer selected, then “Smart Objects”, “Stack Mode” and “Mean” (Median sometimes works for foregrounds, play around with your settings). Let Photoshop do it’s thing, and you have a stacked, clean sky (with a very blurry, unstacked foreground).
Now rinse and repeat the above for the foreground and from there it’s a simple matter of adding a layer mask to the “Sky” group, and using a black brush hiding the blurred foreground to bring in the stacked foreground from the sky (you may need to use the free transform tool to nudge your foreground into alignment).
Now you have a nice, clean image with much less noise than the original capture! This process certainly takes a lot longer than using an automated program such as Sequator, however is a very useful process to know how to do for those times your automated program just doesn’t seem to be able to get it right, which is usually the times when Photoshop will also struggle with auto alignment!

The final image. The clouds have changed in appearance a bit due to the stacking process. I’ve adjusted some of the colour saturation/vibrance added a vignette and boosted the blacks a bit more in the milky way
It’s also a useful trick to use when aligning layers in general, as the puppet warp sometimes is that much more precise!
If this tutorial was helpful, let me know in the comments!