
Post Sequator Workflow - Creating Luminosity Masks to Make that Milky Way Pop!
I’ve been asked to explain my post stacking workflow a bit more, and in particular to discuss how I use luminosity masks to make my Milky Way core stand out more, especially since it can come out a bit flat after the stacking process.
I’ve made my first video below if you want to skip the text and watch the process in action. Please note that this is just one way in which this can be done. Photoshop is quite flexible and there are a few ways to create luminosity masks (which I may discuss in later tutorials) and a few ways in which to dodge and burn!
First step in my process is to open the stacked image as a layer in Photoshop.

Opening up my stacked image that was produced by Sequator
I always duplicate the layer (although not necessary just for luminosity masking, but it is important for the rest of my workflow to keep everything non-destructive).
Step two is to make my dodge (brighten) and burn (darken) layers by clicking on the “add fill or adjustment layer” icon at the bottom and creating two new layers.

Creating Dodge and Burn layers
I name them Dodge and Burn by double clicking on the right hand side of the layer, and prepare the layer by changing the blend mode of the Dodge layer to “Overlay” and of the Burn layer to “Soft Light”. Note that both these blend modes are fairly similar, although soft light is a bit less aggressive than overlay and I find it tends to do a better job of darkening. I have chosen this method for my dodge and burn over some of the other methods as I can add multiple layers of dodge/burn on top of each other and change my brush colour from white to one of the hues of the Milky Way if I want to brighten certain aspects more or add saturation. More on that some other time.
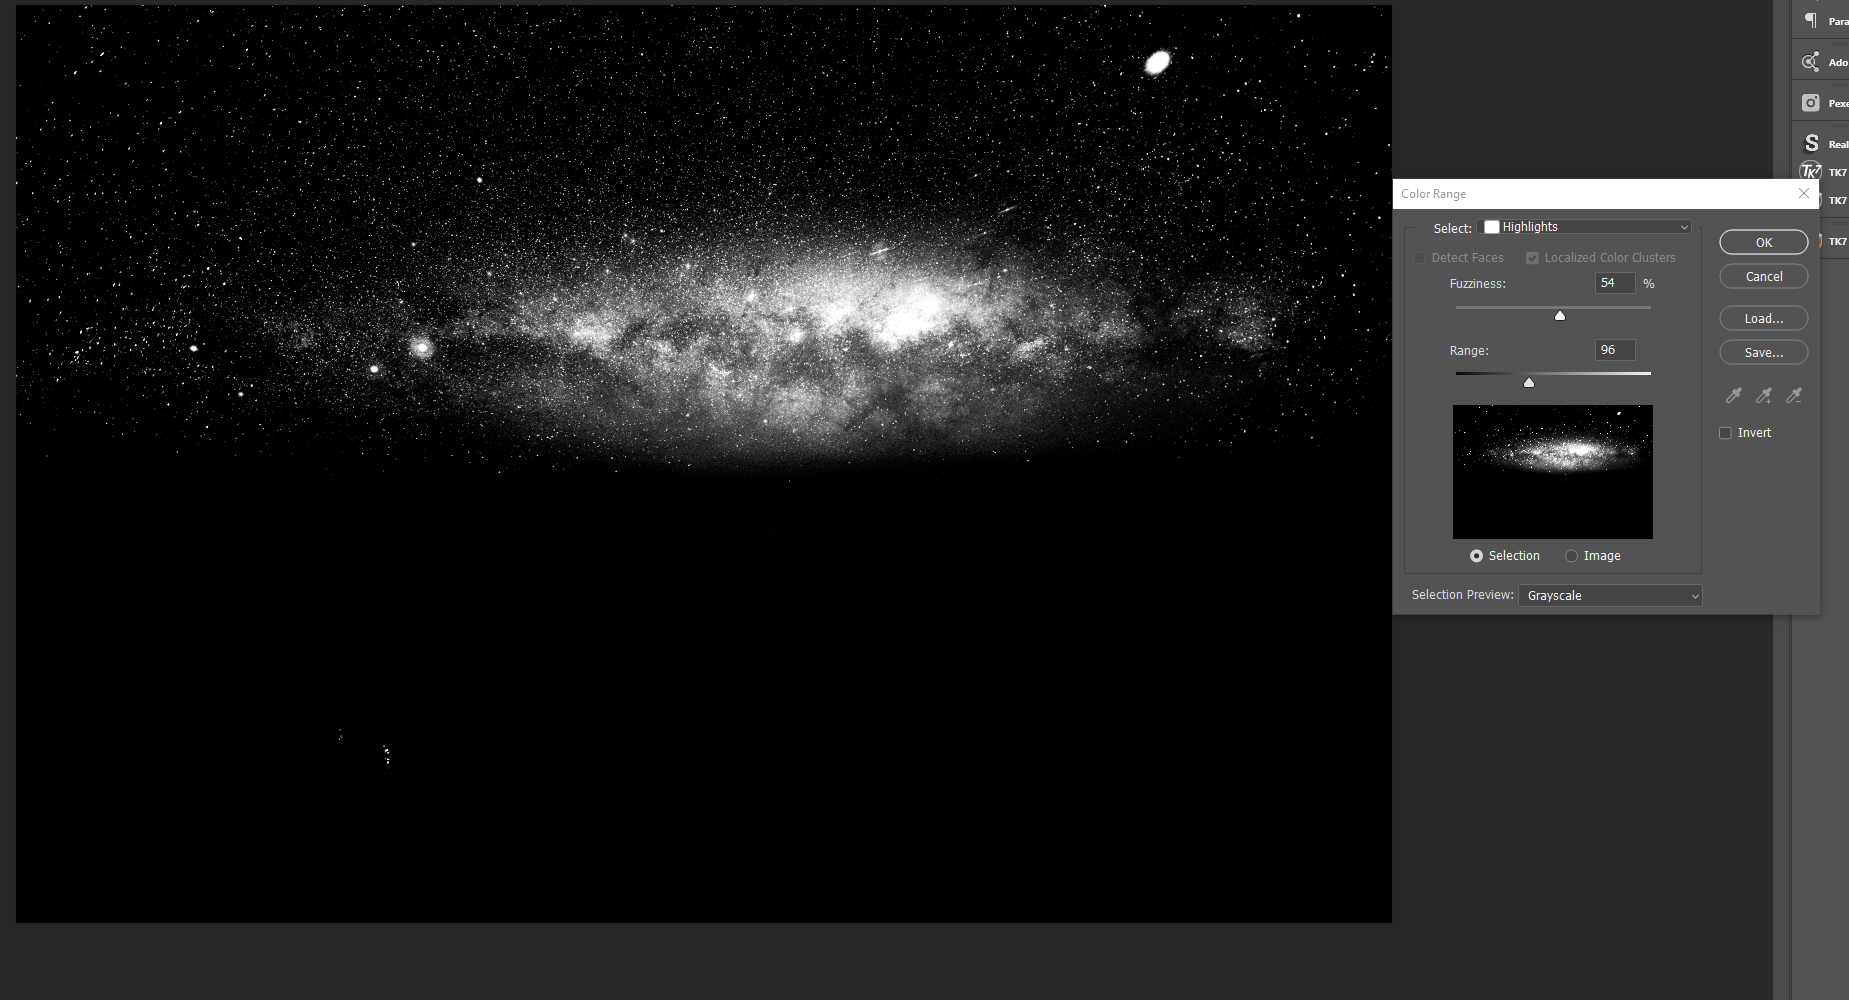
Once my layers are created, it’s time to select the Highlights and Shadows that I want to manipulate.
Click on “Select” and then “Color Range”.

Select Color Range
In this screen, I set the selection preview to “Greyscale” then select “Highlights” in the drop down box. From here it’s a simple matter of adjusting your range and fuzziness to select just the area you want to adjust. In this case - the stars and core. Remember that everything that shows up white in the selection preview will be selected, and everything that shows up black will not be selected. Thus you are aiming for each star to show up white and just the part of the core that you want to bring to life.
Hit OK once you are happy with the selection. You will see the marching ants that symbolise everything that has been selected. These can get kind of annoying and get in the way of you seeing what you are doing, so to hide them hold “Ctrl / CMD” and hit “H”. If you ever want to see the selection again, press the same key combination.
Now that we have hidden the selection, press “B” or select the brush tool. Set it to soft (or 0% hardness). Set your opacity somewhere between 50-80% (I find this gives me a good amount of control) and brush over your stars and Milky Way. It’s OK if the initial painting you do is too harsh (or too white) as you can adjust the layer opacity to tone it down afterwards. In fact, I like to have it slightly overdone so I can see which areas are being affected better, and then adjust it after the fact. Having the brush set to something less than 100% means I can dab over certain areas more than once to have them brighter than other areas (eg/ the middle part of the core).
Once you are done, set your layer opacity to something you are happy with for the final dodge.

Dodge complete. Time to move on to Burn
Hit “Ctrl/CMD + D” to deselect the highlights mask.
The same process is now repeated but for the Shadows, and this time use a black brush instead of a white one after your selection is made. Remember that for this selection, you want everything that is going to be black in your final image to look white on your selection (as that means that is what is selected - confusing, I know).

Selecting Shadows. Everything in white will be selected. Everything in black won’t be (ie/ the stars and bright parts of the core)
In this image, I actually made 2 Burn layers as the first I used to darken both the sky and the core, and the second I applied darkening just to the key aspects of the core. Using the range/fuzziness sliders in the select tool, I could fine tune my selection to get just the part of the core I wanted to darken on my second Burn layer.

Second Burn layer, really trying to hone in on the dark parts of the core here to darken those area’s and not the surrounding sky
And that’s all there is to it! Pretty easy to get a Milky Way core that pops! From here I usually adjust saturation, fix up the foreground and make any other final artistic adjustments to my image.

Dodge and Burn complete. What a difference that has made when compared to the initial image!!!
If you found that useful, leave me a like or comment either here or on my YouTube channel :)